Painting teeth with these 6 steps
Don’t know where to start? Do your teeth look like loose chewing gum? After reading this blog, you’ll know how to fix this :-).
Painting teeth is often perceived as a challenge. Fortunately, it is perfectly manageable once you understand how it works.
Here are a few tips to get you started on painting teeth in oil or acrylic paint
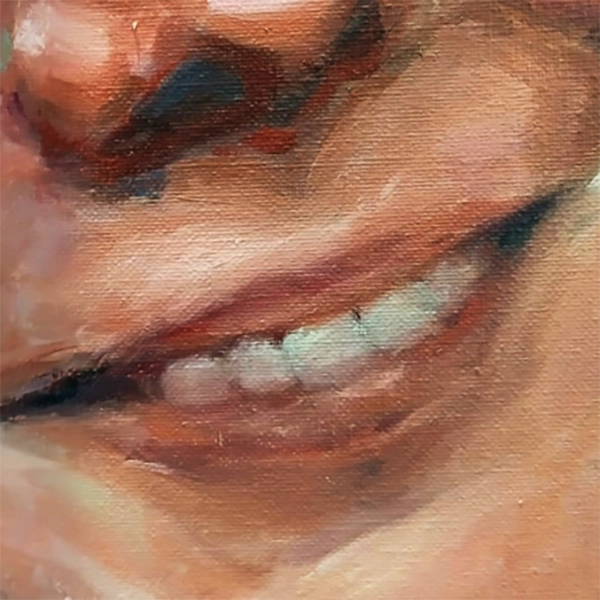
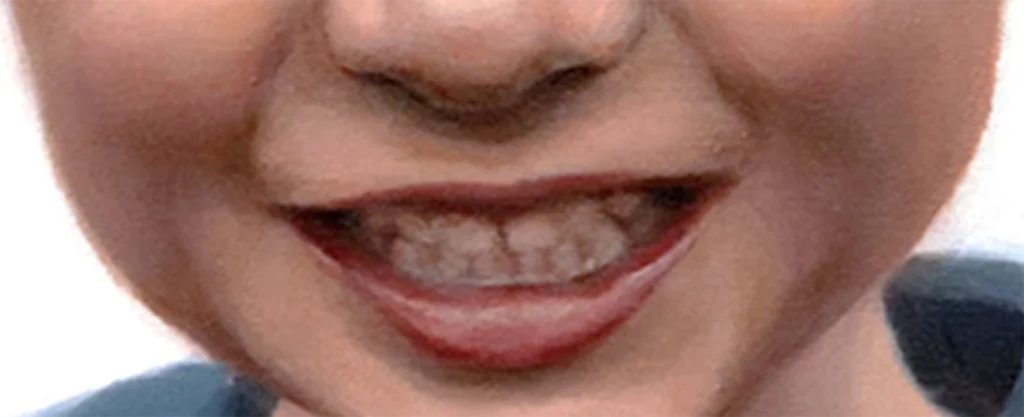
- When painting teeth, it is important to keep the contrast of the edges between the teeth low so that you do not emphasize them too much. Just like with hair and fur, you leave a lot to the imagination. Take a look at the images next to this text.
- The rows of teeth appear almost as a single unit when viewed through your eyelashes. The emphasis is not on the individual teeth, but on the different planes of light and dark along the teeth. Therefore, you focus as little as possible on the concept of a ‘tooth’ and do not outline individual teeth if you want to achieve a realistic effect.
- The shadows that fall over the teeth themselves are often very subtle. If you exaggerate this effect, you get the appearance of rotten teeth.
Step-by-step plan for painting teeth
- Look closely at where the shadow is located around the teeth. If necessary, make an underdrawing to depict the indentations between the teeth. First, find the center of the row of teeth to create a frame that makes it easier to distribute the indentations on either side.
- First, paint the darkest shapes above the upper teeth. Paint only the temples; do not draw lines between the teeth.
- Include the corners of the mouth and then any visible gum tissue near the lower teeth. Paint the gap between the upper and lower teeth if the mouth is open.
- If there are teeth with a clearly dark area between them, as in the painting below, make the area between the teeth dark. Do not do this otherwise, unless you perceive a truly dark contrast here! Note: do not think about teeth, but observe purely form, tone, and color, and try to convey this in your painting.
- Now paint the entire ‘teeth surface’ with a single shade. Paint around the dark areas.
- Next, subtly indicate the shadows over and along the teeth, always keeping the whole in mind. Turn your canvas over if you have the tendency to focus too much on the individual teeth.

How do you mix tooth color?
A mixture for tooth color can be, for example:
- Base mixture: titanium white + a little ochre/Naples yellow + optionally a touch of medium cadmium red + a touch of burnt umber.
- Warm shade: the base mixture with a smaller proportion of titanium white + touches of permanent green and/or emerald green + touch of cadmium red
- Cool shade: the base mixture with a smaller proportion of titanium white + touches of permanent green and/or emerald green and/or ultramarine blue and/or ivory black.
- Lightest parts: base mixture + extra titanium white and optionally extra yellow for warmth
You can also mix yellow ochre and Naples yellow yourself with: titanium white + cadmium yellow medium + a touch of ultramarine blue and a touch of lemon yellow.
Images: geralt and Giuliamar on www.pixabay.com
In conclusion
Hopefully, these tips have been helpful. Do you have any further questions, or is anything still unclear? Feel free to leave a message ;-).
Want to learn how to paint teeth under supervision? My art classes might be for you.
Need more information? Feel free to contact us.